Rails on Rackspace Cloud – Part 2

Part one covered setting up a new Ubuntu server and getting Ruby 1.9.2 up and running with rvm.

Now we will finish the setup with a Firewall, MySQL, Apache2, and Phusion Passenger.

Setting Up the Firewall

Before we install the database and other services, lets get the firewall set up. On Ubuntu, I like to
use the Uncomplicated Firewall – UFW.

sudo apt-get install ufw

That will install the firewall. Now set the defaults, add some rules, and enable the firewall.

sudo ufw default deny
sudo ufw allow ssh
sudo ufw allow http
sudo ufw enable

To see the current rules, you can check the status.

sudo ufw status

Now the only ports open to the internet are SSH (22) and HTTP (80).

Installing MySQL

Now that we’re a little more protected from the outside world, lets install the database.

sudo apt-get install mysql-server mysql-client libmysqlclient-dev

And install the mysql2 gem.

gem install mysql2

Remember to ‘rvm use 1.9.2’ if you didn’t set it as the default.

Installing Apache and Passenger

The database is ready to go at this point, now we need a web server.

sudo apt-get install apache2 libcurl4-openssl-dev apache2-prefork-dev \
                     libapr1-dev libaprutil1-dev

That will install Apache2 and the extra development packages needed by Passenger. Now install the Passenger gem.

gem install passenger

Now we’re ready to install the Passenger Apache2 module. Note, this doesn’t actually install anything. It just builds the module and gives instructions for updating the configuration.

passenger-install-apache2-module

Now we need to create a new module load file to tell Apache about Passenger.

sudo vim /etc/apache2/mods-available/passenger.load

Here are the contents of passenger.load. The first two lines should be all on one line.

LoadModule passenger_module /home/testapp/.rvm/gems/ruby-1.9.2-p180/gems/
    passenger-3.0.5/ext/apache2/mod_passenger.so
PassengerRoot /home/testapp/.rvm/gems/ruby-1.9.2-p180/gems/passenger-3.0.5
PassengerRuby /home/testapp/.rvm/wrappers/ruby-1.9.2-p180/ruby

If we did everything right, we can enable the Passenger module now.

sudo a2enmod passenger

Now we need to set up our virtual host under sites-available.

sudo vim /etc/apache2/sites-available/testapp

Here are the contents of that file. You will obviously need to replace the xx.xx.xx.xx with the IP address of your server.

<VirtualHost *:80>
  ServerName xx.xx.xx.xx
  DocumentRoot /home/testapp/testapp/public
  <Directory /home/testapp/testapp/public>
    AllowOverride all
    Options -MultiViews
  </Directory>
</VirtualHost>

Disable the default web site and enable our new test application.

sudo a2dissite default
sudo a2ensite testapp

Setup a simple Rails App

Create a simple Rails application in your home directory just to make sure everything is working.

rails new ~/testapp
cd ~/testapp
bundle install
rake db:migrate RAILS_ENV=production

Finally, reload the Apache2 configuration.

sudo /etc/init.d/apache2 reload

Go to your server’s IP address in your browser and you should see the default Ruby on Rails index page.

Rails on Rackspace Cloud – Part 1

This is my recipe for starting up a new Rackspace Cloud Server and getting it set up for hosting Ruby on Rails applications.

Part one will take you from a new server to a working installation of RVM and Ruby. Part two will cover installing MySQL, Apache and Phusion Passenger.

If you don’t already have an account with Rackspace, I encourage you to go over to
http://www.rackspace.com/cloud/ and check them out.

I prefer Ubuntu Linux, so let’s start with that.

Starting a New Server

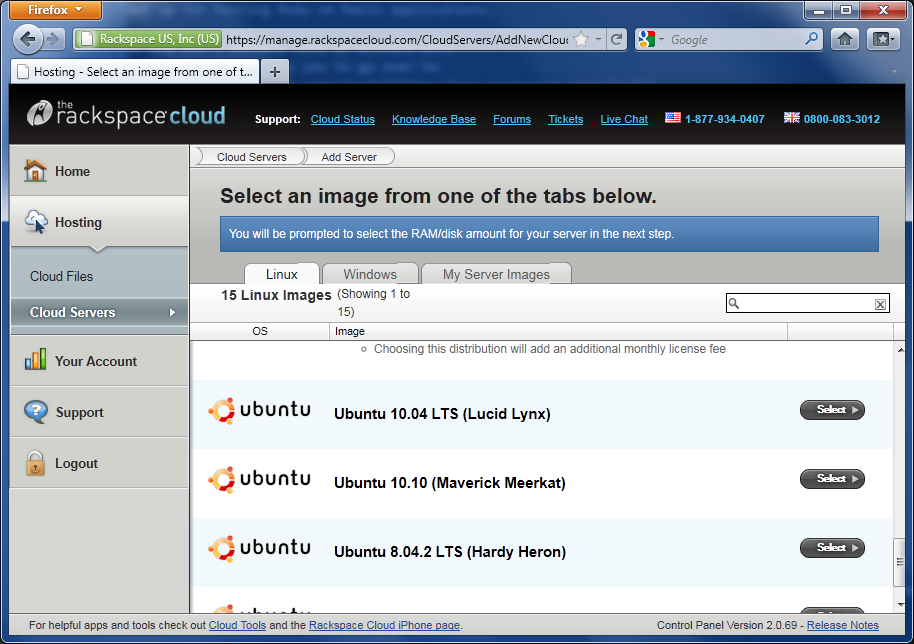
First, sign in to your Cloud Control Panel, then click Hosting, Cloud Servers.

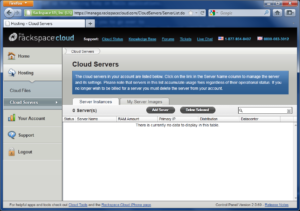
Click the Add Server button, scroll down to Ubuntu 10.10 (Maverick Meerkat), then click the Select button.

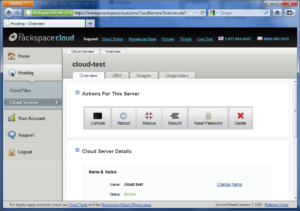
Now type in a server name and select how much RAM you’ll need, then click the Create Server button.

After a short wait, your new server should be ready to go. You will receive an e-mail with your new server’s IP address and root password.

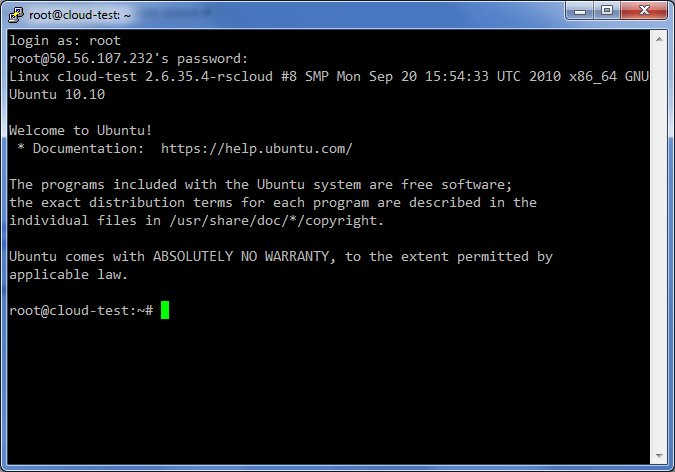
Connect to the IP Address with SSH, log in as root with the password provided, and lets get started.

Initial Login

The first thing you should do at this point is change the root password.

passwd

Type in your new root password twice. Now let’s add a new user account.

adduser testapp

Type in the information for your new user. Add the new user to the sudo group so you can execute commands as root.

adduser testapp sudo

Now that we have a new account to use, we need to deny the root user access via ssh. This will stop people trying to brute-force our root password.

vim /etc/ssh/sshd_config

Find the line that contains “PermitRootLogin” and change the value from “yes” to “no”. Restart the ssh server when you’re done.

/etc/init.d/ssh restart

We have set up a new user account with sudo access and denied root login via ssh, so let’s log out for now.

logout

New User Login

Now reconnect with your new user account and let’s make sure all of our software is up to date.

sudo apt-get update
sudo apt-get upgrade

This should be really fast. Rackspace’s internet connection puts mine to shame.

Installing RVM

Next, we’ll install git so we can install rvm.

sudo apt-get install git-core

Now copy and paste the command below to install rvm:

bash < <(curl -s https://rvm.beginrescueend.com/install/rvm)

Once this finishes, you will see a lot of instructions for setting up rvm as well as a nice “Thank you” from Wayne.

rvm automatically creates a file called .bash_profile in our home directory. This causes bash to skip loading
the regular .profile.

The only thing in .bash_profile is rvm configuration, so let’s just delete it…

rm .bash_profile

and add the configuration to .profile instead.

vim ~/.profile

Add this line at the very bottom:

[[ -s "$HOME/.rvm/scripts/rvm" ]] && . "$HOME/.rvm/scripts/rvm"

Finally “source” your .profile file so the change will take effect.

source ~/.profile

Installing Dependencies

Now we’ll install the rest of the packages we need to build ruby. RVM can provide us a list of needed software.

rvm notes

Look at the line starting with “For Ruby” to get a list of dependencies.

sudo apt-get install build-essential bison openssl libreadline6 \
                     libreadline6-dev curl git-core zlib1g zlib1g-dev \
                     libssl-dev libyaml-dev libsqlite3-0 libsqlite3-dev \
                     sqlite3 libxml2-dev libxslt-dev autoconf libc6-dev \
                     ncurses-dev

Again, this shouldn’t take long.

Installing Ruby

We’re finally ready to install Ruby.

rvm install 1.9.2

We have Ruby 1.9.2 now, let’s use it.

rvm --default use 1.9.2

Installing Rails

Now that we have Ruby set up, we’re ready to install Rails. It should be as simple as this:

gem install rails

Note that when you’re using RVM, you do not have to precede this with “sudo”.

After another short wait, you should be all set.

Verify that the ruby and rails commands work as expected. In part 2 we’ll setup MySQL, Apache and Passenger.

Happy Pi Day

In honor of Pi Day, I thought I would write a little Ruby script to generate pi to a few decimal places.

A quick trip to the Wikipedia page for pi turned up many formulas for computing pi. I took one of the easy ones and set about writing some code.

Most of the formulas involve the factorial function. Unfortunately, Ruby doesn’t have a built in method for computing the factorial. After a little Googling, I found a nice, functional example at the Rosetta Code wiki.

Putting that all together, I ended up with this:

def fact(n)
  (1..n).reduce(1, :*)
end

sum = 0.0

(0..8).each do |n|
  a = fact(2 * n) ** 3.0
  b = 42.0 * n + 5.0
  c = fact(n) ** 6.0
  d = 16.0 ** (3.0 * n + 1.0)

  sum += (a * b) / (c * d)

  puts 1.0 / sum
end

Note that I’m only iterating 8 times. On my PC, that gives pi out to 15 decimal places which is all of the precision available in a floating point number.

Exploring ODBC with Ruby DBI

I recently found myself in an interesting situation.
I needed to extract data from a database. Unfortunately,
all I had to work with was an ODBC name.

If this were a MySQL database, I would have used the
command-line interface to check out the structure and
see what was available.

In this case, I didn’t have a command-line interface.
What I did have was Ruby and irb. Here’s how I got the
job done.

Required Gems

Three gems are required to make this work. First, we
need dbi and a driver (or dbd). The dbd-odbc driver also
requires the ruby-odbc gem.

dbi
dbd-odbc
ruby-odbc

In order to install ruby-odbc on Windows, you will need to
compile it from source. I used the excellent
DevKit
provided with the RubyInstaller and
had no problems.

Connect

Let’s assume that the ODBC Data Source Name is “TestData”.
First, we require the DBI library, then connect to the data
source.

require 'DBI'

dbh = DBI.connect("DBI:ODBC:TestData")

You can also pass a username and password after the connection
string if required.

List and Describe Tables

Now that we have a connection, let’s see what tables are
available.

dbh.tables

My test database only has one table. It’s called “Table1”.
Let’s list the columns in this table.

dbh.columns "Table1"

This will tell us the type of data stored in each field in
addition to the name.

Query For Data

In order to see the actual data, we can prepare and execute
an SQL query. In this case, the separate prepare and execute
is not really necessary, but it’s a good habit to get into.

sth = dbh.prepare("SELECT * FROM Table1")
sth.execute

row = sth.fetch

The fetch method will return a row of data at a time until
there is not more data. At that point it returns nil. Calling
fetch again after it returns nil will result in an exception.

A Complete Example

Here’s a simple example of connecting to the ODBC database and
displaying all of the data in a tab separated format.

require 'DBI'

dbh = DBI.connect("DBI:ODBC:TestData")

sth = dbh.prepare("SELECT * FROM Table1")
sth.execute

puts sth.column_names.join("\t")

while row = sth.fetch
  puts row.join("\t")
end

sth.finish
dbh.disconnect

You could also require the CSV class and use it to generate comma-separated
output.

To Hex and Back (With Ruby)

I am a big fan of plain text. It is easy to view and easy to edit. Unfortunately, it is sometimes necessary to work with binary files and data.

Ruby’s inspect method does a decent job of showing the contents of a binary string, but sometimes I need something a little more powerful.

Back in the day I would use a hex editor to open binary files and decipher their contents. I don’t have a need for a hex editor anymore, but I would like to occasionally view binary data in the same format.

After some intense Googling and Ruby doc reading, I came up with a few methods to convert a binary string to hex, and convert a string of hex back to the original binary.

Bin to Hex

To convert a string to it hex representation, first take each byte, convert it to hex, then join all of the hex digits back together.

def bin_to_hex(s)
  s.each_byte.map { |b| b.to_s(16) }.join
end

If you like spaces between the hex digits, change join to join(‘ ‘)

Hex to Bin

Converting the string of hex digits back to binary is just as easy. Take the hex digits two at a time (since each byte can range from 00 to FF), convert the digits to a character, and join them back together.

def hex_to_bin(s)
 s.scan(/../).map { |x| x.hex.chr }.join
end

If you find yourself using these frequently in a project, you could add the methods to the String class.

TIMTOWTDI

Of course, there is more than one way to do this. Ruby also provides the handy pack and unpack methods for Arrays and Strings respectively. These are a little more cryptic since you need to know the meaning of the format string to understand what’s going on.

def bin_to_hex(s)
  s.unpack('H*').first
end

def hex_to_bin(s)
  s.scan(/../).map { |x| x.hex }.pack('c*')
end

Check the Ruby documentation for Array and String for a complete explanation of pack and unpack.

Examples

Here’s the output of a quick IRB session to demonstrate how this works.

irb(main):001:0> s = "Hello, World!"
=> "Hello, World!"

irb(main):002:0> s = s.each_byte.map { |b| b.to\_s(16) }.join
=> "48656c6c6f2c20576f726c6421"

irb(main):003:0> s = s.scan(/../).map { |x| x.hex.chr }.join
=> "Hello, World!"

These methods are no replacement for a hex editor, but if you need to check an encryption key or some other short string of binary, they can be just the thing.

10 Years

I remember September 9, 1999 like it was yesterday…

Paige and I were living in a tiny upstairs apartment. Thanks to a friend of a friend, we were some of the first people in town to have a cable modem.

Back then it was uncapped and since we were officially helping to “test” it, I think it was free for the first few months. Going from around 50k dial-up to at least 5,000k cable made the internet a lot more enjoyable.

Also around this time I discovered a new program called Napster. It was a friendly place where people got together and shared music.  While you were downloading songs from other users you could chat with them about their collections.

The generosity of others, combined with the cable modem, meant I was able to download music faster than we could listen to it. It was fun to have friends over on the weekend and let them pick what they wanted to hear from my endless jukebox.

This was also around the time of our complaint to Domino’s Pizza.  Our pizza arrived cold, and Paige called to tell them about it.  The person on the phone replied “No problem Ms. Lewis.  We’ll get another pizza out to you right away.  You’re one of our best customers.  You’ve ordered over 100 pizzas this year.”  Apparently we ate a lot of pizza in those days.

The big news story at the time was Y2K.  Many people believed that at the stroke of midnight on December 31, 1999 every computer in the world would stop working.  This would cause a world-wide black out, stock markets would crash, dogs and cats would live together, etc.

I set the clock on my computer ahead to December 31, 1999 at 11:59 PM and watched it roll over to January 1, 2000.  Nothing bad happened so I wasn’t too worried.

In an effort to make Y2K seem a little scarier, some news outlets also reported on the 9-9-99 bug.  Supposedly, four nines was the code that told some mainframes to end the currently running program.  The theory was that when the mainframes encountered this date, they would stop working.

This sounded as ridiculous to me then as it does now. So, on September 9, 1999 I wrote my first ever blog post about the 9999 bug.  (That’s right kids, I was blogging when blogging wasn’t cool.)

I had a few web pages before that date, but this was the first thing I ever wrote in the “blog” style.  It was a title with a few paragraphs of text, posted on a certain date. I didn’t call it a blog, of course. I had seen a few people set up their web sites like this before and I wanted to try it out myself.

Things have changed a lot since those days.  Back then I updated the site by editing the HTML in notepad and using WS_FTP to upload the pages to a web server.  I’ve moved on through several different programs to write blog posts, but I made sure to preserve that first post through all of the moves.

Die Spammers

Do you have your own blog?  Is it full of spam?  Are you sure?

A while back a friend of mine asked me a question about her blog.  Everything looked normal in every newsreader except for Google Reader.  In Google Reader every post appeared to be nothing but pharmacy spam.

I looked for the spam in view source, I downloaded the feed and checked it, I even crawled through the PHP code looking for a clue.  Everything looked perfectly normal.  It wasn’t until I started digging through the database, that I discovered what was happening.

Somehow, the spammers replaced two plugins on her site with their own malicious plugins.  These new plugins changed the contents of each post based on the referrer.  That’s why spam only showed up when viewed by Google.

The clue was in the “wp_options” table in a field called “active_plugins”.  I noticed a couple of plugins that started with a dot.  For example, instead of “akismet/akismet.php”, the name was more like “akismet/.akismet.php”.

In Unix, file names that begin with a dot are hidden by default.  The initial dot is so subtle that most people won’t even notice it in the database.  Especially since there’s lots of other information in that field.

Discovery

Here’s a simple way to check your site for this kind of spam.  You can restrict a Google search to a single site by adding “site:domain” to your query.  For example, to search for the word Vaigra on my site try something like this:

viaghra site:anthonylewis.com

This should only show one result for my site – this page.   Put your domain name in place of “anthonylewis.com” to see the results for your site.  If you get lots of results, then you have a problem.

Removal

The first thing I did to remove the spam was change all of her passwords – WordPress, Database, and FTP.  We used much more secure passwords.  I have another post in the works that addresses secure passwords.

Next, I made sure she was running the latest version of WordPress.  Updating WordPress is getting easier all the time.  It’s always been a simple 2-3 step process, but now it’s almost automatic.

Finally, I removed the plugin files with the initial dots and cleared the “option_value” from the database for “active_plugins”.  This disables all of the plugins.  Don’t forget to enable the ones you really need.

Aftermath

Unfortunately, the spam on her site still shows up in Google’s cache.  It’s been over a week now.  I’m not sure how long Google keeps pages in their cache, but this should go away soon.

One option I would recommend if you’re having a problem with stale data in Google’s cache is the Google XML Sitemaps plugin.  This plugin maintains an XML file that lets Google know where to find things on your site and when they were last updated.

Help

Let me know if you’re having this problem.  I have a lot of experience working with WordPress and I would love to help you out.  Leave a comment below or click the Contact link at the top of the page if you’re shy.

I provide advice and guidance for free.  If you’d rather I log on to your site and completely remove this mess, I’ll do that for a small fee.

Why Facebook Will Fail

Everyday I log in to Facebook to see what my friends are up to.  It’s a great way to keep up with my old friends who are now 300 miles away.  Even with all of it’s current popularity, I feel like it will fade away in time.  Here are my reasons.

The Platform Was A Mistake

Thanks to the Facebook Platform, there’s always a new silly quiz to take or some other application wanting my attention.  I mostly ignore those things, but sometimes I give in.

This is where the problems start.  It’s not enough to just take the quiz, the quiz also wants you to invite all of your friends to take it, too.  Also, by taking the quiz, you have to agree to give the program access to all of your information on Facebook.

This has always struck me as a little odd.  I usually spend as much brainpower trying to make sure that this program doesn’t e-mail everyone on my friends list as I do actually taking the quiz.

Facebook Quiz

I believe a social network should be centered on the people involved.  They’re the reason the site exists.  The applications are just a distraction to get people to spend more time looking at the ads.

It’s a Walled Garden

Facebook released their API partly in response to my second criticism.  It’s closed.  There’s no way to share things on Facebook with other people, unless they’re also members.

What if I want to share my pictures and status updates with everyone?  This isn’t possible with Facebook, yet sites like Flickr and Twitter make it easy.  Also, what if I want to export my data from Facebook?

The Platform could easily be used to create applications to make sharing easier, but it’s against the terms of service.  Facebook recently shut down an application that made your data available as an RSS feed citing privacy concerns.

This is kind of a double-edged sword.  I think one of the initial reasons for Facebooks rise to popularity was the fact that it was initially only available to college students.  It was like a private club.  Obviously, that made outsiders want in even more.

Now that the site is available to all, there should be a way to make the data more readily available.

It’s Nothing New

Like I mentioned earlier, there are many other ways to share your information online.  Facebook is nice if you didn’t already have a blog or some other means of sharing your thoughts and pictures online.

Facebook does make it easier to keep up with friends, but it’s not rocket science.  A group of tech-savvy friends could just as easily set up a blog for each person, then subsribe to all of their RSS feeds.

For me, it seems like just another inbox sometimes.  Why should someone send me a message through Facebook, when they could just e-mail me?

I’ve also starting using the Twitter application so that my Twitter updates also update my status on Facebook.  If there was an application to make my friends status show up as a feed, I would probably never visit Facebook.

Thanks to the fact that the site is fueled by advertising, that’s never going to happen.

Blog Posts I’m Tired of Reading

I read quite a few different blogs.  I feel like I should since I sometimes write one.  I read mostly about programming and other technical things.  I probably spend 10-15 minutes per day skimming the headlines in Google Reader, looking for interesting articles.

It’s nice to have a few things to read while I’m waiting for a script to run or eating lunch.  Unfortunately, there are certain types of posts that seem to reappear regularly.  These are a few of the posts that I’m tired of reading:

How To Make Money Blogging

I know that some people make their living as a blogger, and I think that’s great, but I’m tired of reading about it.  What I really can’t stand are people who make money by writing a blog about how to make money blogging.

I’ve fallen into this trap myself in the past.  I created a few different blogs with Google and Amazon ads.  I even made a little money doing this, but it’s not something I can maintain for any length of time.

Blogs with lots of ads (especially ads that pop up on words inside the posts) make me a little uncomfortable.  Like I said, I still have a few blogs with ads on them, but I don’t really feel good about it.

If I never see another post about link baiting, SEO, or how to get on the front page of Digg again, it’ll be too soon.

Arguments About Nothing

For some people, everything is a religion.  There is no gray area, everything is black and white.  You’re either with us or you’re against us.  Windows vs. Mac, Emacs vs. Vi, Windows vs. Linux, Ruby vs. Python, the list goes on forever.

Use the right tool for the job and get on with your life.  Just because I use a Mac at home doesn’t mean I’m an idiot.  I use a Windows PC at work, and that doesn’t mean I don’t like Macs.

The worst are posts written by people who don’t really even know what they’re talking about.  For example:

“You should use a Mac since Windows computers always get viruses.”  I’ve never had a virus on any of the Windows PCs I’ve used.  Am I just lucky?

“Macs are overpriced, you can get a PC with the same hardware for a lot less.”  I look at a lot more than hardware specs when I buy a computer.  What about the operating system, the applications, the community, the build quality, the design?

I will never understand why some people spend every day of their life trying to convince other anonymous internet users that their way is the only way.  What a waste of time and effort.

Personal Attacks

To me, this is about the lowest thing you could possibly write about online.  Yet I still see these kinds of posts on blogs.

I can’t even imagine a situation that would cause me to try to belittle someone else online.  What can a post like this possibly accomplish? If you don’t agree with someone, why not just ignore them?

Maybe it has something to do with television.  Some people aren’t happy unless there’s drama in their life.  I guess it’s nice when people comment on the post and agree with your assessment of the other person.

Just like the endless debates I mentioned earlier, I’ve never seen anything positive come from a personal attack of someone online.  I don’t ever remember a time when a victim of one of these posts said “You know what, you’re right.  I’ll change my ways.”

That’s Enough For Now

I think I’ll stop here.  I’m not really sure what the point of this post was.  I don’t imagine it will change what other people write about, but it can’t hurt to try.

Maybe later I’ll talk about the kinds of posts that I enjoy reading.  In the mean time, what are some posts that you’re tired of reading?

Unblocking Attachments in Outlook

Microsoft Outlook is the mail client we all love to hate.  My personal favorite feature is the way it handles attachments.  If you’ve used Outlook very much, I’m sure you’ve seen this message:

blocked-att

Here Microsoft is protecting you from itself by blocking an Access database attachment.  The attachment is still there, you just can’t get to it.  Very frustrating.

The recommended solution is to use a program like WinZip to compress the file before you e-mail it.  You can also just change the extension since Outlook doesn’t actually check to see what kind of file it attached.  Both of these can be a hassle for the sender, so I started looking or a better solution.

Google To The Rescue

Spend a little time researching this problem and you’ll see that there is a lot of information online about how to get around this message.  I was able to solve the problem, but it involved using information from several different sites.  This is my attempt at putting all of the information together into a series of easy steps.

Check The Mode

First, you need to find out what Security Mode access is using.  To do that, click Help, About Microsoft Office Outlook on the menu.   You should see a screen like this:

sec-mode-def

This means I’m currently using the “Default” Security Mode.  The other options are “User Controlled” and “Administrator Controlled”.  If yours says “Default” or “User Controlled” you can follow my steps and unblock attachments.

If you’re in “Administrator Controlled” security mode, then you’ll need to talk to your e-mail administrator.  If anyone really wants to know, I can also tell you how to get around “Administrator Controlled” mode, but that’s a post for another day.

Now click OK to close the “About” window and exit from Outlook.

Edit The Registry

The next few steps involve editing the registry.  Be very careful when you do these steps.  It’s pretty easy to break Windows by changing the wrong settings in the registry.  If you break it, you get to keep both pieces.  I won’t be able to help you unless you’re willing to bring your computer to my house.

Click Start, then Run.  Type regedit and click OK

Drill down in the registry to this key:

HKEY_CURRENT_USER\Software\Microsoft\Office\11.0\Outlook\Security

Once you get there, right-click on Security and click New, String Value.

Type in Level1Remove for the name, then double-click Level1Remove to edit the value.  This value is a list of extensions you want to unblock separated by semicolons.  For this example, you can type .mdb  It should look something like this:

reg-key

Click OK to save the value, then close the Registry Editor and reopen Outlook.

Success

If you added the registry key in the right place, Outlook should now be in the “User Controlled” security mode.  Also, you should see something like this when you open an e-mail with an Access database attached:

unblocked-att

Now you can add any other file extensions that you don’t want to block to the same key in the registry.  Just be sure to separate each one with a semicolon and include the dot before the extension.

Leave a comment below if you have any trouble and I’ll try to help you out.