Keep Talking

I’m giving the beginner talk at this month’s Austin on Rails meeting. Come to Capital Factory at 7:00pm on January 27 to learn about Active Record Associations. After my talk, Steve Madere is covering Hobo. Austin on Rails is always a lot of fun. The Rails community in Austin is great, there’s free pizza, and drinks and socialization after the meeting.

I’m also leading an evening workshop called Getting Started with Ruby on Rails for General Assembly on Monday, February 2 from 7:00pm – 9:00pm. General Assembly is new in Austin, but the company has been around since 2011. Today they teach classes all over the world.

This workshop covers the tools used by Ruby on Rails programmers, the basics of the Ruby programming language, and the components of Rails and how they work together. If you know the basics of web development, and are curious about building web apps with Rails, come spend the evening with me and see what Rails is all about.

Rails Crash Course

After way too many nights and weekends, and way too much iced coffee, it’s finally done…

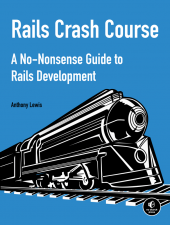
Rails Crash Course Cover

Rails Crash Course is my new book on the Ruby on Rails web framework. This book is based on the curriculum I’ve used in the past to teach Ruby on Rails to both new programmers and experienced web developers.

The first section teaches the fundamentals of both Ruby and Rails. It covers the model-view-controller pattern used by Ruby on Rails in detail. At the end of the first section you learn how to set up a git repository for your application and deploy it Heroku.

The second section covers more advanced topics such as authentication, testing, performance optimization, security, and debugging. These concepts are explained as you build a simple social network app. It also covers creating your own Web API. The book concludes with a chapter on setting up your own Amazon EC2 server and deploying your application using Capistrano.

The book should ship around the middle of October (I already have my copies). You can preorder the book directly from No Starch Press or from Amazon.

Lone Star Ruby Conf 2013

Tickets are now on sale for the Lone Star Ruby Conference 2013 in Austin, TX from July 18-20. The speaker line-up this year looks amazing.

This will be my third year to attend and my second year to offer training. I am teaching two sessions on July 18.

My morning session is called From X to Ruby. It is designed for developers with experience in other languages who are looking to move to Ruby. I will cover the basics of Ruby syntax and idioms with an emphasis on things that are different from other languages.

My afternoon session is simply called Advanced Ruby. It is the perfect next step for people in my morning session, or anyone else who has some experience with Ruby, wanting to “level up” their skills. I will discuss Ruby’s object model, modules / mixins, and metaprogramming.

I’m looking forward to reconnecting with the community, both local and from around the world. If you’re at all interested in Ruby, I highly recommend this conference and I hope to see you there.

Upcoming Events

It’s a great time to be a Rubyist in Austin. There are several upcoming events that I’m looking forward to attending.

First, I’m giving a talk on Rails Application Security at the Austin on Rails meeting tomorrow evening. The meeting will also feature lightning talks covering a variety of beginner topics. Be sure to get there early.

Next, the second session of my GeekAustin Beginning Rails class starts August 4. The last class went really well and I’m looking forward to teaching it again. There are still seats available. For full details and to sign up, see the EventBright page at http://geekaustinrailsclass.eventbrite.com/.

Then, the Lone Star Ruby Conf starts on August 11 with a day of training. Followed by the conference proper on August 12 and 13. The keynote speakers and session topics are all outstanding this year. I am not speaking (this year), but I plan to be an active participant. Hopefully I’ll see you around town.

Your First Rails 3 Plugin

On several different projects I have needed to find the newest and oldest record in certain models. The code to do this is pretty simple (especially in Rails 3).

For example, here is a snippet to find the newest Post:

@post = Post.order('created_at DESC').first

We can make this even better by defining a method in the Post class like this:

def newest
  order('created_at DESC').first
end

With this new method our code becomes:

@post = Post.newest

But now we’re faced with having to add that method to lots of different models. This sounds like a perfect job for a simple Rails 3 plugin.

It’s Just a Gem

Plugins in Rails 3 are created just like any other Ruby gem. You can use whatever you like to create a new gem. Currently, I’m using Bundler:

bundle gem date_filter

This will create several files for you. The most important are the gemspec file and the contents of the lib directory.

The gemspec

Your gemspec file tells the world about your gem. The first thing you’ll want to do is edit this file and fill in the information marked with TODO – your name, e-mail address, gem summary, and gem description.

The rest of the file should take care of itself. Note that the gem version is stored in date_filter/version.rb. Also, the list of files, test files, and executables is filled in automatically with git commands.

The lib directory

Inside the lib directory you’ll find a file called date_filter.rb and a directory called date_filter. A common practice is to keep the contents of date_filter.rb pretty minimal.

Most of your actual code should go in separate files inside the date_filter
directory. For example, here is my date_filter.rb file in its entirety:

require 'active_record'
require File.expand_path('../date_filter/base', __FILE__)

ActiveRecord::Base.class_eval { include DateFilter::Base }

Note that I am requiring ActiveRecord here. This is based on wycats advice – If You Override Something, Require It

Next I require base.rb inside the date_filter directory. This contains the source for the plugin.

The last line actually includes my code into ActiveRecord::Base. Since I am adding class methods, I use class_eval.

date_filter/base.rb

Finally, here is the code for the plugin. It’s common practice to separate class methods from instance methods in Rails plugins. In this case I have a separate module for the class methods.

When DateFilter::Base is included into ActiveRecord::Base the method included is called. This method then extends ActiveRecord::Base with the methods in the ClassMethods module.

module DateFilter
  module Base
    def self.included(base)
      base.send :extend, ClassMethods
    end

    module ClassMethods
      def newest
        order('created_at DESC').first
      end

      def oldest
        order('created_at ASC').first
      end
    end
  end
end

Building and Installing

If you made it this far, you’re ready to build and install your new plugin. Bundler includes some rake tasks to help with this
automatically. You can see these by running rake -T

rake build
rake install
rake release

rake build will create a directory called pkg and build your new gem into this directory. You can then install it with the gem command.

rake install will build and install your new gem. To use it in a Rails project, you will need to add it to your Gemfile and run bundle install.

Releasing

If you have an account at RubyGems.org you can also release your new gem. Check your profile page for your API key. Include your API key in ~/.gem/credentials as instructed, then run rake release to build and upload your gem to the site.

This should get you started building your own Rails 3 plugins. There are still a couple of pretty important things missing from this process – tests and documentation. I plan to cover both of these in a future post.

The complete source for this plugin is up at github. The gem is also available at RubyGems.org.

GeekAustin Rails Class

Starting on May 26 I will be teaching a beginning Ruby on Rails class for GeekAustin. The class will meet every Thursday from 7:00 PM – 9:00 PM at Cospace. I have developed a pretty ambitious course outline that I hope to cover in just 8 weeks.

The class is only $120 for 16 hours of training. The demand for Rails developers is so high right now, this is a tiny investment to get started in a very hot market. Someone who understands Rails inside and out can make that money back in a couple of hours (or less).

You will need to know some HTML and CSS. Previous programming experience would also be helpful, but is not required. Prior experience with Ruby or Rails is also not required. I’m going to cover everything you need to know and provide plenty of references to other materials to fill in any gaps in your knowledge.

I have really missed teaching, and I am so thankful for this opportunity. Developing the course outline and working on materials has been great. It seems like I’m exercising a part of my brain I haven’t used in a while. I honestly can’t wait to get started teaching this.

This class will fill up fast. For full details and to sign up, see the EventBright page at http://geekaustinrailsclass.eventbrite.com/

Editing Multiple Records in Rails

I recently had a requirement to create a single form with data from more than one record. This is a simple request, but I had never done it before in Rails.

After experimenting for a while (and reading quite a few forum posts and StackOverflow answers) I came up with a working solution. Hopefully this will save someone a little time in the future.

First, let’s create a simple Rails app for managing users. Each user will have a first name, last name, and e-mail address. I’m using scaffolding to generate the code.

rails new multi_edit
cd multi_edit
bundle install
rails g scaffold User first_name:string last_name:string email:string
rake db:migrate

Next, add the new routes for editing all users. I tried to stick to the RESTful convention with these. I’m just using the word ‘all’ in place of the :id.

match 'users/all/edit' => 'users#edit_all', :as => :edit_all, :via => :get
match 'users/all' => 'users#update_all', :as => :update_all, :via => :put

Now, let’s add the edit_all method to our UsersController to get started. The only thing it needs to do is get all users.

def edit_all
  @users = User.all
end

Next, we build the form for editing all users.

<%= form_for :user, :url => update_all_path, :html => { :method => :put } do %>
  <table>
    <tr>
      <th>First Name</th>
      <th>Last Name</th>
      <th>E-Mail</th>
    </tr>
    <% @users.each do |user| %>
      <%= fields_for "user[]", user do |user_fields| %>
    <tr>
      <td><%= user_fields.text_field :first_name %></td>
      <td><%= user_fields.text_field :last_name %></td>
      <td><%= user_fields.email_field :email %></td>
    </tr>
      <% end %>
    <% end %>
  </table>

  <div class="actions">
    <%= submit_tag %>
  </div>
<% end %>

The interesting part of this code starts around line 9. As expected, we iterate over the users with @users.each.

The next line tells Rails to name the fields for each user with array notation. For example, user_fields.text_field :first_name will output a text field named user[1][first_name].

The params hash will include a ‘user’ key that contains a hash of information for each user. The key for each of these hashes will be the user id.

Now that we know what the params will look like, it’s pretty straight-forward to write the update_all method.

def update_all
  params['user'].keys.each do |id|
    @user = User.find(id.to_i)
    @user.update_attributes(params['user'][id])
  end
  redirect_to(users_url)
end

We iterate over each key in params['user'], then find and update the user associated with that id. I am leaving error checking as an exercise for the reader…

The complete source code for this simple application is on my GitHub page at https://github.com/anthonylewis/multi_edit

A Better Looking Terminal

I spend a lot of time in the Mac OS X Terminal.app. Unfortunately, the built-in color schemes are all pretty terrible. I can’t stand to look at any of them for more than a few minutes.

So, one of the first changes I make on a new Mac is to update the default color scheme. It’s surprisingly easy to make something much easier on the eyes than the Basic theme. Here’s how I do it.

  • On the Terminal menu, click Preferences
  • Click Settings on the toolbar

  • Make sure the Basic theme is selected
  • Now click the Gear, then Duplicate Settings
  • Type the name Metal

  • On the Text tab, change the Text and Bold Text colors to Mercury and the Selection color to Steel

  • On the Window tab, change the Background Color to Lead

  • Finally, click the Default button

When you open a new terminal, you should see something that looks
more like this:

Now that is something I can work with for a while.